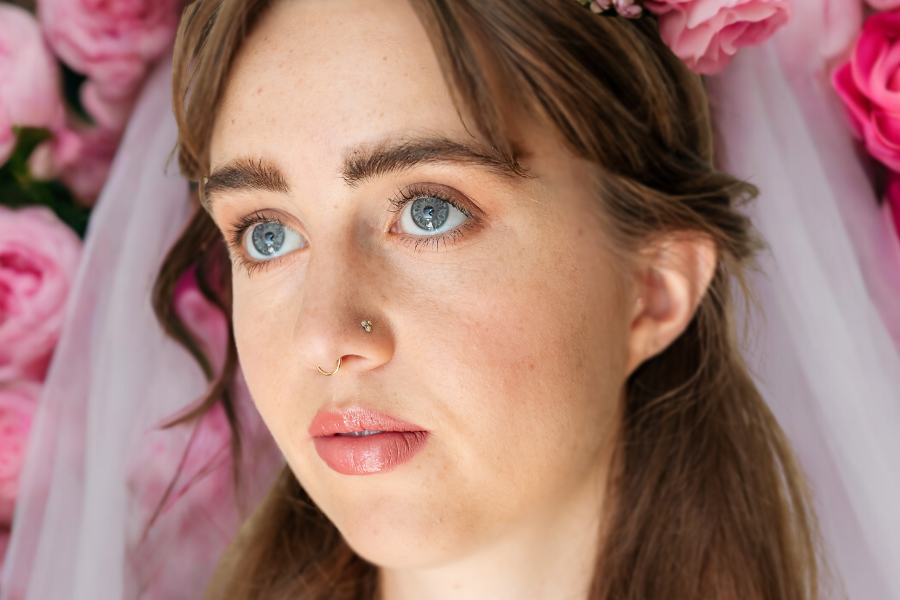
Life can be crazy and sometimes all we need is a quick but effective makeup tutorial. This is where we outline the necessary steps to make sure that you get your stunning face of makeup done and ready. If you are looking for a more in-depth tutorial on bushy brows and full lips be sure to tap the links. Now, get your brushes ready and prepare to curate a beautiful face of makeup in no time.
If a purchase is made from the links provided, Wed Mayhem may receive a commission.
01
Moisturizing is key:
To start off this whole look, prepare your canvas aka your beautiful face by applying moisturizer. This will enhance your natural glow and prime your face for primer! We used the Hale and Hush Moisturizer.
02
A little quick primer and a little quick glow:
Second, get your primer ready. We used the Smashbox Photo Finish Primer. Taking a thick flat brush and a small amount of product dabble the primer under the eyes and blend out onto the cheek. Be sure to not over do anything. Next, taking a round foundation brush take a bit of the complexion glow booster to create a glowing and soft focused look. You can place this all around the face to create as much glow as you want! Make sure to blend the product in and keep things light. We used the Elf Halo Glow Liquid Filter.
03
Contour and blush queen!
Contouring can add dimension and color to the face. This is great if you want to pull out some of your features like cheekbones. Taking your flat contour brush, grab a color that works with your skin tone and contour under your cheekbones and just around the forehead. We used the Studio Fix Sculpt Contour Palette by MAC. Finally, to cap off our face, it’s time to add a little bit of your favorite rosy blush. Don’t make anything complex here! Take your fluffy blush brush and add a little bit of rosiness to your cheeks. This will give you color! We used the MAC Sheertone Blush.
04
Bush and fill them brows:
Now, what is the face of makeup perfection without a bushy brow? Start with your brow wax and a spoolie. Begin by brushing your brows upwards with the wax on the spoolie. An alternative to brow wax is brow glue which will give you the same results. We used the Mehron Pro Brow Palette. Use a brow pencil to fill in some areas of your brow that have some space. Use light strokes to mimic eyebrow hair. After you have filled in your brows, take your waxed spoolie and brush over the areas that were just filled. This will help to blend in the pencil with the hair. We used the Benefit Precisely My Brow Pencil in 3.5 which works with almost all eyebrow hair colors. For a more in depth look check out all our favorite steps to perfecting the bushy brow.
05
Did someone say eyes?:
Always begin by priming your eyes. We used the Matte Ulta Beauty Eye Primer. Using a medium fluffy brush, take a light brown color and begin on the outside corner of your eye. Wherever you place your brush first is where you will get the most color so make sure you are starting in the outside corner of your eye. Moving the brush in a circular motion, slowly begin to drag the color into the top of the eyelid. Using a slightly smaller fluffy round brush, take a light skin-toned color and move from the middle of the eyelid towards the inner corner of the eye. Blend this color into the light brown on the outside of the eye. Finally, take a shimmery color and apply in the inner corners of your eyes. This will make them pop! We used the ManEater Palette by Tarte. For a more indepth eye tutorial check out our clean bridal look.
06
Mmm mascara:
It’s time for magic! If you wish, you can take a flat brush with a dark brown color and line the lash line. This will create the illusion of depth and thickness. Now, curl your lashes and apply your mascara. We used the Elf Lash It Loud Mascara. Complete the top or the bottom lashes first and let them completely dry before completing the other side. This will lower your chances of mascara flying all over the place.
07
Finally, it’s gloss time!
Feel free to line your lip to create dimension, but if you are craving a purely glossy finish you can apply your lip gloss and be on your way! If you are choosing to line your lip, start at the outside corners and go in. Make sure to stay on your natural lip line as you trace the corners. It can be easier to use the flat side of your pencil rather than the pointy side when tracing the corners of your lip. We use the Charlotte Tilbury lip pencil in the color pillow talk. After outline your lip, apply your lip gloss. We use the Charlotte Tilbury lip gloss in the color Pinkgasm. If you are seeking a tutorial on creating a full lip check out our professionally backed full lip tips.
There you have it! You will have a glowing face of makeup in no time. This tutorial is great to make sure that you get on your way with minimal hassle, but you’ll be looking fresh and beautiful.













Comments
Nothing Yet
Be the first one to comment!
Comment Submitted
Thank you for your comment, you will receive an email when your post is public. Your Wed Mayhem Team